Tissue Paper Cherry Blossoms

It seems like I’m have developed an obsession with tissue paper lately. When I saw this pretty cherry blossom piece on Pinterest, I knew the last of my tissue paper tiles leftover from my suncatcher project will have ANOTHER life…just in time for Chinese New Year and spring too!

This turned out to be a great “big kid” project with the Dumpling because it involved multiple steps (technically two, but that’s double the number she was used to following!). Each step also allowed room for exploration (read: deviation) and the end result would still look fabulous. Below is my tutorial modified specifically to working with a two year old.

Materials

  • Printout of a cherry blossom branch (Note: I hand drew mine because I still don’t have a printer yet. I used brown and black washable markers, then traced the drawing with a wet brush to replicate a watercolor vibe. The link of the printout is to an external website.)
  • Red, pink and/or white tissue paper cut into approximately 2-3 cm tiles
  • Glue
  • Plastic tray (optional)

Step 1: Crumple the tissue paper into little balls

I showed the Dumpling how to crumple the tissue paper with her fingers and in the palms of her hands. Unlike the tiny beads needed for the mosaic hearts, the balls can be tight or loose for this activity—both work and produce different effects.

Step 2: Glue the crumpled tissue paper onto the branches

To prevent the Dumpling from going overboard with the glue, I poured a thin layer into a plastic plate, asked her to dip the crumpled tissue paper in, and replenished the glue as needed.

It was a game of chance where the Dumpling pasted on the flowers but I did try to direct her attention to the branch ends where they would naturally cluster. When she missed the tree entirely, I complimented on how lovely the falling petals looked. I also occasionally rotated the paper so she didn’t concentrate too much in one area.

When I felt there were enough florals on the tree (which was entirely based on personal preference), we concluded the activity by admiring the tree in full bloom. Yay!

Happy Chinese New Year!

Mosaic Hearts with Tissue Paper

On Valentine’s Day eve, I realized that the Dumpling didn’t have a card for daddy… which really meant that I didn’t have a card for jigg. While it would be easy for me to cut and paste something together, I wanted the Dumpling’s involvement since the card would be from the both of us.

I still had a bag full of tissue paper tiles left over from my suncatcher project, so I re-purposed them into beads to make mosaic hearts.

Materials

  • Tissue paper cut into approximately 2-3 cm tiles
  • Glue
  • Heart cutouts approximately 3-5 cm wide
  • Plastic tray (optional)

Instructions

Step 1: Roll tissue paper into tiny beads

I made approximately 40-50 beads per heart, but the number would vary based on the size of the tissue paper tiles and heart cut out.

Step 2: Apply glue generously on one side of the heart

I spread a thin layer of glue onto a plastic tray and instructed the Dumpling to put the hearts in. Naturally she smeared them around so they picked up a generous amount of adhesive. I  then quickly took the hearts out with the sticky side facing up and hid the glue.

Step 3: Cover the sticky side of the heart with tissue paper beads

I asked the Dumpling to pour the beads on the hearts.

img_3373-1

Alternatively I placed the heart inside a plastic container with the beads, closed the lid, and asked the Dumpling to shake.

As always, I was on the sidelines filling in large gaps where the glue didn’t pick up the beads and making sure the Dumpling didn’t rip the tissue paper off once they were glued on. She actually was too busy pouring the beads from one container into another to pay much attention to the hearts at this point.

Once the hearts dried, I glued them onto a card. We love you, daddy! Happy Valentine’s Day.

Make Lantern Favor Boxes From Red Envelopes

The Dumpling’s playgroup recently asked all of the parents to bring in treats for a Chinese New Year party. Me being…well, me, I spent more time thinking about the presentation and packaging than what to actually bring. It just so happened that jigg brought home packs of red envelopes from work, so I decided use them as the base material for the project. I remembered making paper lanterns when I was a kid—with a bit of tweaking on my end, they turned out to be great goody bags!

Materials

  • Large red envelopes made out of quality paper (avoid the flimsy, small envelopes—they won’t be sturdy enough)
  • Scissors
  • Glue

Directions

Step 1: Cut off the envelope as indicated in the picture below. Discard the envelope flap on top and the very thin strip on the bottom. There are now three pieces to work with: the large piece will form the body of the lantern; the medium piece will form the base; and the small one at the bottom will form the handle.

Step 2: Fold the large piece of the envelope in half horizontally. Optional: Make a vertical fold down the middle to mark where the center is.

Step 3: Cut strips starting from the bottom (folded side) to form a fringe but stop approximately 2 cm from the top edge. Do not cut all the way through! (Tip: To get more evenly spaced strips, first cut down the middle along the vertical fold to create two halves, then down the middle again to create quarters, then down the middle again to create eighths.)

Step 4: Unfold the envelope and fluff the strips outward.

Step 5: Using the small piece of the envelope (from Step 1), open it up like an “O” and glue both sides to the top edge of the lantern.  Optional: Cut open the “O” to adjust for a longer strap before gluing.

Step 6:  Using the medium piece of the envelope (from Step 1), cut open the folds on both sides to create two strips.

Step 7: Glue the strips into a cross shape and loosely fold the flaps to the size of the lantern’s bottom base. 

Step 8: Glue the flaps to the inside bottom of the lantern. The base would most likely not be a perfect fit, so adjust the flaps before the glue dries as a workaround.

Step 9: Fill the inside with several pieces of bite size candy or chocolate coins. Be careful not to overload the lantern—the weight capacity would be dependent on the strength of the paper stock and glue.

Tip: I churned out over a dozen goody bags during the Dumpling’s nap time. The trick to mass producing these quickly is to make one lantern from beginning to end to get familiarize with the process. Then I did everything in assembly line fashion—meaning, I did all of Step 1, then all of Step 2, and so forth.

Happy Chinese New Year!

Colorful Ice Hearts

The Dumpling recently painted on ice as an activity in one of her playgroups and absolutely loved it. To replicate the activity at home with a Valentine’s Day twist: I set out to make heart shaped ice. I didn’t have ice molds, so I experimented using my trusty cookie cutters instead—seems like I have done everything except bake with them!

Materials

  • Shallow plastic tray that is bendable (I upcycled a plastic food tray)
  • Plastic heart cookie cutter
  • Water

Instructions

Step 1: Pour several millimeters of water into the plastic tray with the cookie cutter inside. Please note that using too much water will make it hard to break off the excess ice later.

Step 2: Freeze on a flat surface.

Step 3: Gently break off the ice along the outside edge of the cookie cutter. The entire sheet of ice should come off the tray easily but be careful not to remove the cookie cutter.

Step 4: Put the cookie cutter back in the tray and add more water to the inside of the mold. It’s okay if some water leaks out. Optional: Add the ice that was broken off from the previous step to create a jagged effect.

Step 5: Freeze on a flat surface.

Step 6: Clean off the ice around the heart and gently wiggle/bend the mold free. If it’s stuck, wait a minute and try again.

Activity Ideas:

Color the Ice

Instead of painting directly on the ice, I also sprinkled salt over it at the start of the activity. Salt lowers the ice’s freezing temperature, so crevices will form where the ice starts melting. When the Dumpling painted food coloring on, the colors ran into the cracks for a beautiful effect.

Once the ice started turning brown, I rinsed it with water for a clean slate again.

Color with Ice

Once the ice soaked up enough food coloring, I asked the Dumpling use it as an “ice crayon” to color with it on paper.

Or just add food coloring before freezing.

Making Tissue Paper Suncatchers With a Toddler

I love asking for the Dumpling’s help in my arts and crafts because it’s a great way for us to work together…even if she’s more troublesome than helpful most of the time. Now that she’s older, I began involving her in more steps throughout the process whereas in the past, she was only responsible for only one task (or the entire activity consisted of only one task).

One of the first “big girl” projects we did was making suncatchers out of tissue paper for Valentine’s Day. There are many tutorials online—I just tweaked and combined steps from various ones to suit the needs of working with a two year old.

Materials

  • Tissue paper cut into squares
  • Scissors
  • Plastic tray or plate (make sure it’s bendable)
  • Elmer’s glue diluted with equal amounts of water

Notes Before Starting

Whenever the Dumpling is involved, I always do the prep work behind the scenes beforehand. For example, I had the tissue paper cut and the glue diluted at the start of the activity to avoid dealing with my daughter growing impatient.

I brought out only the supplies needed at each step. For example, I had the tray and tissue paper out during step one and kept the glue hidden until step two. Otherwise the Dumpling would fidget with the glue prematurely.

I also learned that activities often don’t go as planned with a toddler. If I ask the Dumpling to do X and she ends up doing Y, then Y it is! Even though it’s frustrating at times, I have come to accept that exploration is more important than results at this stage.

Step 1: Layer the pieces of tissue paper onto the plastic tray

This was actually a good exercise for the Dumpling to practice her fine motor skills since the tissue paper required gentle handling—she crumpled and ripped a few, but casualties were expected. I was on the sidelines spreading clumps apart, filling in thin areas, and putting the pieces back into the tray because she kept taking them out after she was done.

Step 2: Drench the tissue paper with the glue mixture

I put the diluted glue in an old plastic sauce container for the Dumpling to pour in. To prevent her from taking the now wet tissue paper out (yep, she was still at it), I took the tray away immediately and thanked her for a job well done. Yay!

Yes—that’s it. She helped with two steps.

Step 3: Let the tissue paper dry completely and peel off

The entire sheet should come off easily without tearing.

Step 4: Cut into hearts or other desired shapes

The Dumpling was quite pleased with the results, but it took her a while to realize that these are fragile (the epiphany came after destroying the fourth one) and needed to be handled with care.

Craft Idea #1: Instead of taping the hearts on a window like traditional suncatchers, I strung them into a mobile and hung it inside the Dumpling’s tent.

Craft Idea #2: Use them in Valentine’s Day cards.

The Dumpling’s First School Interview

“Thank you for your enrollment application for our Kindergarten. We would like to invite you and Remy to school to meet with one of our teachers. It will be a good opportunity for parents to have a further understanding of the school and a chance for us to get to know your child.”

The Dumpling got invited for a school interview, but my initial excitement upon receiving this email was quickly replaced by bewilderment—mostly wondering what on earth would they ask a two year old?!

Friends and family have warned me before my relocation to Hong Kong that its education system is extremely competitive, but I shrugged it off. While enrolling her into a decent school is a priority, enrolling her into the best school isn’t. It was never my intention to leave the education, discipline, and upbringing of my child solely in the hands of teachers; being a supportive and involved parent is just as important. This may also be an unpopular opinion in Hong Kong, but I don’t believe that academics is the golden ticket to success…good grades can only get you so far in life.

The primary reason why I want to get her in ASAP is so she can develop social skills with other kids, a lesson that I will never be able to provide.

(And so I can catch a break everyday.)

I received the invitation last Thursday. The meeting was scheduled for this past Monday. Prepping the Dumpling did cross my mind, but I decided against it. I didn’t even bother Googling what these interviews are like… it’s not like we can cram or pull all-nighters together. If there was something she couldn’t learn in the last 26 months of her life, I doubt four days would be a game changer.

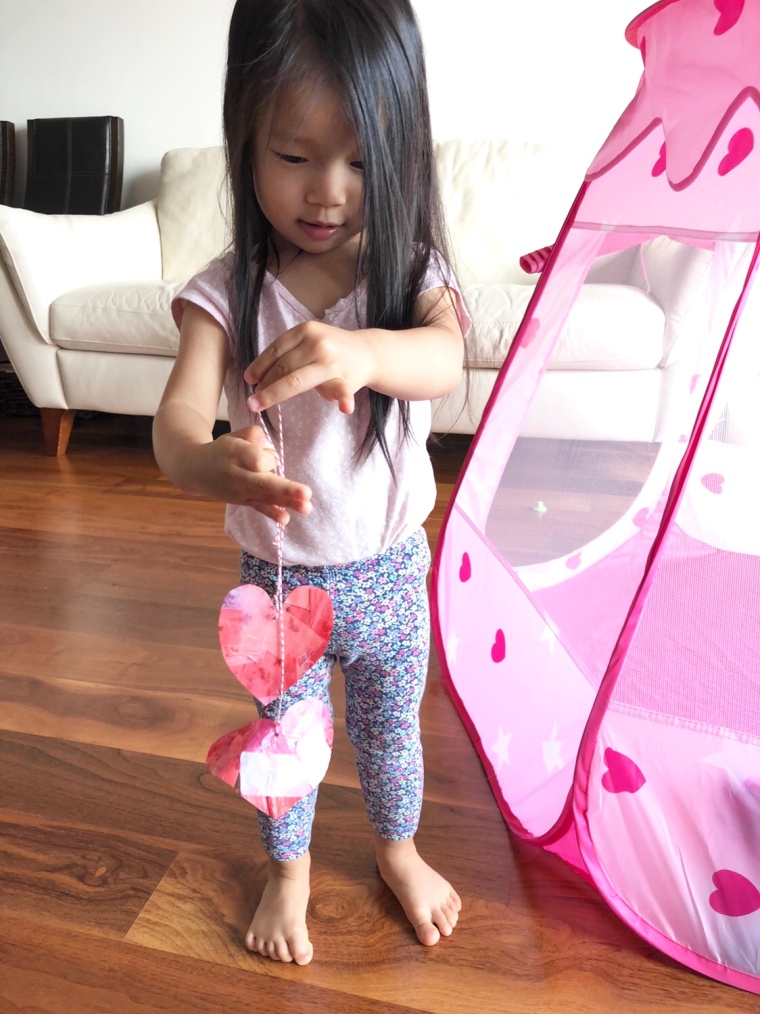
On the morning of the big day, I dressed her in a cute pink floral outfit, gave her a cookie (as a bribe to be a good girl), and off we went.

Upon arrival, the school receptionist asked what the Dumpling’s primary language is. When I replied that she understands both Cantonese and English, a Cantonese teacher greeted us and started conversing with my daughter.

We had a lackluster start because the Dumpling wasn’t very responsive. When she did speak, it was in English. The teacher then suggested meeting with the English teacher instead. At that moment, I realized how important answering the language preference question was on the application. Maybe it was because I was there instead of jigg since the Dumpling prefers to speak English with me and Cantonese with her dad.

The English teacher then brought us to an office, a type of room where I imagined a kid would go to when he/she gets in trouble. She had a box of materials such as color pencils, books, toys, stickers, paper, etc. The set up looked serious.

Object Recognition

The teacher first took out an ABCs book and asked the Dumpling to name the fruits, objects, and animals on each page. The Dumpling flew through each one since the pictures were typical ones found in most children’s books.

Color Recognition

Next the teacher gave the Dumpling a piece of paper, took out a set of color pencils, and handed them to the Dumpling one by one. As the Dumpling scribbled, the teacher asked her to name the colors: red, orange, yellow, blue, green, purple, pink, brown, purple, and black.

We had one hiccup; there wasn’t a white pencil so the teacher pointed to the paper and asked what the color of the paper is. The Dumpling misinterpreted and started doodling on the spot that the teacher pointed to. After two more attempts, the teacher moved on. I understood why the Dumpling was confused, but held my tongue since I didn’t want to come off as a helicopter mom.

Number Recognition

For the following exercise, the teacher shuffled a set of flashcards with 1 through 10 and asked the Dumpling to read the numbers. She breezed through them since we just finished number recognition recently.

Shape Recognition

Flashcards of various shapes were presented for identification. The Dumpling got every one: triangle, rectangle, circle, square, diamond, star, heart, and hexagon. Yes, there was a hexagon in the deck. I was patting myself in the back for that one because jigg thought it was a useless shape to teach a toddler. HA, proved him wrong!

Counting

The teacher then took out a basket of chips and asked the Dumpling to count with her. I immediately knew my daughter wouldn’t be able to do this yet; but I nonetheless let the teacher lead. After a few attempts, I stepped in and explained that we were still working on this concept.

Miscellaneous Questions

Various one-off questions were also scattered throughout the interview, such as:

  • Is the elephant big or small?
  • What is your favorite color?
  • How old are you?

In the end, I asked the teacher how the interview will be evaluated. She replied that it’s not really what the child knows but how he/she communicates and interacts. Her answer sounded suspiciously incomplete but I didn’t press. If the assessment were purely subjective, what was the point of all those tests?!! Regardless of the results, I was so proud of my daughter and gave her three cookies on our way home.

I already knew ahead of time that the kindergarten was completely full. The interview was just something to cross off the application process in the event that a spot opened up. In the meantime, I intend to join a parent-accompanied play group that meets three days a week. I really do miss the U.S. where I can just drop the Dumpling off at daycare for 10 hours everyday. If one can be found here, please take my money!

(I finally did Google what the nursery school application process is like in Hong Kong…this shit is insane!)

Paradoxical Expectations of the Working Mom

Working moms today are often harshly criticized because we are held to almost impossible standards—we are expected to work like we don’t have kids; and we are expected to raise children like we don’t work. Even when fathers are assuming more child rearing and household responsibilities, they are praised as doing extra while mothers are seen as only doing par. The home is still seen as our primary domain, and it’s up to us to figure out how to level the playing field if we want to be with the big boys in the corporate world.

Climbing the Corporate Ladder

Like many female colleagues of my generation, I was encouraged to “have it all” and look up to women who seemingly found a way to balance work and motherhood. I found myself struggling to sustain my career momentum, however, once the Dumpling come into the picture. In a fast-paced city like New York, where nine hour days are the minimum and anything above is normal, the grind can be especially gruesome. Compared to my colleagues who come in earlier, leave later, and participate in after-hour social events, I often feel like I’m not a team player because I dart out of the office at 5:30 pm.

While other moms are more understanding, there are a few who think every woman should make the same sacrifices they did. There’s the successful female executive with the “I-did-it-and-so-can-you” attitude who thinks the rest of us are just a bunch of complainers. Then there’s the stay-at-home mom who questioned my judgement in putting the Dumpling at daycare when she was only six months old.

Although progress is headed in the right direction, corporate America still isn’t too family friendly. Maternity leave is not mandatory and left to the discretion of the employer. Americans also clock in more hours per week (special shout out to New York!), have fewer holidays, and vacation days compared to most of our European counterparts. While taking holidays and long lunches are culturally acceptable in Europe, it carries a negative stigma in the U.S. The higher up the corporate ladder the we climb, the more we are expected to be accessible 24/7 and available to travel regularly.

Meeting the Demands of Modern Day Motherhood

Even if moms are willing to grind it out, childcare is a common challenge. The core U.S. household is typically made up of only the parents and their children. Therefore, extended family members, like grandparents, do not play major roles as caregivers on a daily basis, and most working parents are forced to seek outside help. Day cares often have long wait lists, are expensive, and penalizes heavily on late pick-ups. jigg and I pay $270 a week, and we are fortunate to have our in-laws do the evening pick ups and babysit for about an hour until I get home. Otherwise, the current local rate for a nanny runs anywhere between $15-$25 an hour. While live-in helpers are common in Asia for many middle-class families, they are entirely out of reach for most in the U.S. For example, a cost of a live-in helper in Hong Kong, who helps with not only childcare, but also cooking, cleaning, errands, and general household chores six days a week costs approximately $4,010 HKD per month, or $514 USD. That’s about a week’s pay for a nanny in the U.S.

Modern parents also need to be very involved. Child experts recommend a barrage of activities that parents should do with their toddlers to develop their sensory, gross motor, fine motor, social, and communication skills. Once school starts, parents are expected to review homework assignments, attend parent-teacher conferences, volunteer for funds raises, etc. Most of these responsibilities inevitably fall onto the mother.

Society in general has expectations (often hidden in a form of unsolicited advice) of how our children ought to behave by cherry picking from the best practices across different cultures. My elders brag about how they managed to put dinner on the table every night, do chores by hand, and raised kids without the fancy gadgets. I’m told to admire the French, who cook sophisticated meals for their children and are firm in their discipline. Compared to Americans, we have raised a kiddy population of obese, picky eating dictators. My Chinese relatives bring up how so and so enrolled their children in swimming, piano, and Mandarin classes and advised I should look into them as well before my daughter falls behind.

Time Scarcity

Capture

It’s no wonder that I always feel like there’s not enough time; I’m working two full time jobs on a daily basis. In the span of 24 hours, “work” and “commute” take up approximately 12 hours of my day; there’s not much I can do to easily change these unless I quit my job or move closer to the city. “Sleep” takes up eight hours (Do I really need eight hours? Yes, I do), which leaves me with the remaining four to do everything else under “other”.

“Other” is a category that includes getting the Dumpling ready for daycare in the morning, then feeding, cleaning, playing and putting her to bed at night. Somewhere in between, I also have to eat, tidy up the house, and make time for jigg and me. I’m scratching my head trying to find time to do everything else I’m supposed to be doing as a “good mother.” If I attend that happy hour, I would miss tucking my daughter in bed. If I cooked in the evenings, being in front of the stove would take away from time spent reading to her. If I enrolled her in weekend classes, she would be spending even more time with outside caregivers than her parents.

Learning from my elders and parents in other cultures should serve as an inspiration. But when their best practices are used as baseline comparisons of how I ought to parent, it’s easy to become disheartened. I remind myself that while they face challenges that I cannot relate to, I have career aspirations and societal expectations that my mom didn’t have, or work hours and childcare costs that my mommy friends from other countries don’t face. As a result, I pick and choose my parenting battles and accept that I do some things better and fall short on others.

Kid’s Birthday Parties Are Stupid But I Keep Throwing Them!

The Dumpling is turning two years old in less than a month, and I’m currently in a full party planning frenzy. My dining room table is taken over by scraps of paper, half assembled favor bags, and experimental decorations that are at the edge of becoming either Pinterest wins or fails.

I often question why I invest so much effort into something that the Dumpling won’t remember. Before becoming a mom, I thought that kid’s birthday parties are stupid. Now that I have a little one, I still think they are. jigg is personally against the social extravagance and wants nothing to do with them. As a result, leaving me alone and babysitting the Dumpling are his forms of support.

A Look Back at the Dumpling’s First Birthday

Planning the Dumpling’s first birthday was my first DIY project after an almost two year hiatus. It was also a personal test to see if I still have any creative juice left after exhausting all my energy into motherhood. I always thought having children was another milestone to a fulfilling and meaningful life, but motherhood ended up feeling more like a chore. Since giving birth, my days revolved around nursing, pumping, changing diapers, and working. In a depressing reality that I didn’t want to admit, I felt tied down because of the things I gave up to make room for my daughter. I never thought of myself as an “I can’t” person, but I became one.

“I can’t go to happy hour because I have to go home to take care of my daughter.”

“I can’t meet you for dinner because the Dumpling’s bedtime is 7pm.”

“I can’t go shopping because I have to pump/nurse every three hours.”

“I can’t meet you in the city because I can’t carry the baby, the stroller, and the diaper bag on the train.”

“I can’t leave the baby at home because I want to spend more time with her.”

“I can’t take on this project because I don’t have time.”

“I can’t [insert activity] because I’m so tired.”

Even as I revisit my reasons now, I still believe they were legitimate and can sympathize with my past self. However, I knew that if I didn’t drag myself out of this mentality, I would eventually lose myself.

My road to self re-discovery started with crafting because it didn’t violate my “I can’t” reasons; I had no excuses. Honestly it could have been anything – cooking, baking, photography, writing, piano, etc. I used the Dumpling’s birthday party as my objective and immersed myself into making it happen. Again, it could have been any occasion; it just happened that the Dumpling’s birthday was around the corner when I had the epiphany. I took every opportunity during the Dumpling’s nap times on weekends to create banners, tassels, favor boxes, and other party decorations. I could have easily bought everything on Amazon or Etsy, but I was insistent on making my own. In the end, I managed to pull together a not-so-scary Halloween-ish themed orange and black celebration.

The truth was that the party was as much for me as it was for the Dumpling. It boosted my confidence and helped me rediscover the things I loved before my daughter overtook my life.

It turned out that I can!

As I undertook new arts and crafts projects, I began merging my hobbies with spending time with my daughter so that I was able to derive fulfillment simultaneously in both. I sculpted with play dough, built a cardboard theater, penned a silly poem, made a board book, turned my daughter’s finger painting into a coffee table book, and started writing again. One project led to another, and I’m now an aspiring mommy blogger who sees the Dumpling as my muse.

As unnecessary and extravagant as I still think kid’s birthday parties are, I will continue throwing them as yearly celebrations of everything my daughter and I have achieved together. I also look forward to the day when the Dumpling is old enough plan and bring her own parties to life. The task my seem daunting for a little girl, but I will be able to teach her that she also can!

Splashes, Smudges, and Spills: The Dumpling is Now a [Self-] Published Artist 

When the Dumpling first started finger painting, I didn’t have high expectations after seeing that her primary techniques consisted of slapping, smearing, ripping, and crumpling paint and paper together. She proved to be a prolific artist and whatever survived the production process was whimsically lauded as “abstract art.” jigg and I proudly framed and shamelessly shared our daughter’s colorful messes with family, friends, co-workers, and anyone who was willing to admire them. They played along in our ruse by comparing her work to modern artists, asking for copies, reserving future pieces, and even offering commission.

Since everyone seemed to be on-board the “fake it until we make it” boat, I wanted to take the game to the next level: convert the Dumpling’s work into a book and enable her to claim the title of being a published artist. Besides, I have been looking for a good coffee table book lately.

After laying each painting out, I saw how much of the Dumpling’s personality embodied her work, from her obsession with a particular color (she went through a phase where she only wanted blue), to her impatience with dotting paint (she preferred pouring it), to her stubbornness to follow my instructions (hence the mess). The compositions also showed an amusing progression in her thought process. The amount of paint used was indicative of her interest level; white space showed trepidation while total color coverage signified her full embrace of the medium. In one instance, the Dumpling was looking for fresh space as every inch of her work area was used. Without missing a beat, she flipped over her existing piece of paper and continued on her newfound, blank canvas. Although unintentional, it produced an unique effect.

My DIY book binding project.

What started out as ordinary toddler art turned out looking like a legitimate portfolio. In hindsight, we never had to fake it. It just took my mommy goggles time to focus, some proper image cropping, and several hours of my labor (which mommy normally charges a pretty penny for) to bring out their fully glory.

To capture the spirit of her work, I titled her book, Splashes, Smudges, and Spills.

Click here to read Splashes, Smudges, and Spills

I already have plans to have the next edition of her book professionally printed in hardcover. Let me know if you want to get in the pre-order.

(I’m being serious!)